
Photoshop allows some essential and basic photographic editing to be done, but even just the most basic processes can greatly enhance images for both amateur and professional photographers. Photoshop is also known for its creative capabilities as well as its aesthetic corrective tools.
Eliminate the Ever Devastating Red Eye
Many group, holiday or special events photographs are ruined by the occurrence of a photographic phenomenon known as "red eye," which is simply light reflecting back from the wide-open pupil of the subject(s). Some digital cameras have a flash setting meant to conquer red-eye occurrences, but they are not always a guarantee against it. Photoshop has a red-eye tool to identify, diminish or completely eliminate the appearance of red eye in an image. With Photoshop, you can remove all red eyes, even those of your cat or dog.
Create Clearer and Brighter Photos
Another Photoshop tool meant to help clean up an image or improve its appearance is the suite of color enhancing tools that will increase or decrease contrast and hue and brightness. This allows a photographer to manually adjust an image's color settings to give it the sharpest and cleanest appearance possible, even when you're starting out with an all too dark image.
Who is that Person in the Background? Crop them Out!
Photoshop also has several tools for cropping an image, or cutting elements out of a picture all together. The cropping feature allows for an image to be resized and enhanced, meaning that a group image taken from too far a distance and with too great of an allowance of background can be cropped down to fill the frame and refocused to be clear and sharp at the new focused setting. Or, if there's someone in the photo you don't know or aren't fond of, you can simply cut them out.
Get Artistic
For more artful experiments, Photoshop allows color images to be altered to black and white or even altered to a whole variety of hues and colors. There are a tremendous numbers of palettes, tools and filters to apply to images to great effect. A color photograph can be cropped or resized, have all of the colors reversed and the hues changed, or filters applied to make the image appear to be textured or created from another medium such as a painting. The experimentation possible with the software program is almost limitless. As both an image repair program and an artist's tool, Photoshop is a good place to explore photography and photographic enhancement.
Read More...
Guest Book :
Blog Archive
Thursday, February 19, 2009
Simple Ways to Edit Your Photos in Photoshop
Photoshop Trick
Before Photoshop tricks can be described, it is essential to give a definition for what Photoshop in fact is. Photoshop can therefore be defined as being a photo manipulation program distributed by Adobe and used for making modifications to photographs requiring attention, through colour corrections and sharpening, to create an amazing looking image as a result. The majority of photographs, graphics, and logos used in web applications are modified and created with use of the Adobe Photoshop software available.
Photoshop is a well-known, internationally used web application program and it is thus no wonder why so many requests for training for the proper use of this software are being received by Photoshop professionals; being qualified to give lessons and who have an immense amount of knowledge in Photoshop tricks which their students can thoroughly benefit from using.
Teaching Photoshop
Mastering Photoshop is all about experience and so the majority of professionals giving Photoshop training emphasize interactivity, giving beginners Photoshop tricks for use in real-life situations. These Photoshop tricks have as such been developed so that the user is able to get the most out of Photoshop. The Photoshop training which is made available by Intoweb is thus focused on teaching students the skills necessary to master the Photoshop software and consequentially to create unbelievable Photoshop applications as a result.
The following Photoshop tricks and effects are taught by professionals in Photoshop through lessons which are made available for the benefit of the public, for application in the creation of an unbelievable Photoshop document:
* Photography Basics: confronting technical aspects of photography such as exposure and depth of field, Photoshop has the tricks to transform your pictures into world-class photographical images.
* Page-Curl Effect: Photoshop tricks used for turning part of an image up to reveal its back side. With Photoshop an image can be bent using either the folding or curling options, given texture using bump maps, and orientated in 3D space.
* Shadow/Highlight Tool: Photoshop has the tricks to make images brighter and darker all at the same time. The tools available for carrying this out allows a user to calm highlights down and bring out shadows in an image in one easy step.
* Tattoos: with Photoshop you can build tattoos which look highly realistic for retouching and adding glamour to an image.
* Washed Out Old Brick Wall: Photoshop tricks for creating an aged brick wall to be used as a backdrop for films, video games, and posters.
* Optimising GIF's: GIF's are much smaller in size than JPEG's and so when creating a Photoshop web application, the reduced file size of a GIF should be taken advantage of.
Read More...
Thursday, February 12, 2009
15 Photoshop Tips to Make Your Life Easier

Is Photoshop driving you up the wall? Here are 15 simple tips to make using Photoshop easier.
1. When working on a colour image, you can use the Paint Brush tool to selectively "paint away" colour to black and white. It can make one portion of your image really stand out. In the Paint Brush Options palette, change the blend mode to Colour, and paint away the colour
2. When using your magic wand tool you can press your Shift to add more to the selection, or press your Alt to take away from the selection.
3. If you have a lot of images to display, use Photoshop's image gallery to build a webpage of images that are thumbnailed for you. FILE > Automate > Web Images Gallery
4. Double click on the 'T' on a Type layer in the Layers Palette to automatically select the entire text layer. There are at least two ways to switch between the various measurement units that Photoshop displays.
5. One is to change them in your Preferences by going to the Photoshop menu under Preferences and choosing Units & Rulers (in Photoshop 7 under Mac OS 9, Preferences is found under the Edit menu). From here you can change the ruler units and click OK.
6. The second way is to open the Info Palette (go to the Window menu and choose Info) and click on the small triangle next to the cross in the lower left quadrant. This will bring up a menu that will allow you to change units on the fly.
7. To cycle through different screen modes, simply press the F key
8. You can select only the pixels and not the transparency area of the layer by holding the Cmd/Ctrl key and clicking the mouse on that layer in the Layers palette.
9. Do you have a layer style you like to use a lot? You can save that layer style as a style that will show up in your styles palette. In the Blending Options, just under OK and Cancel you'll see 'Save Style'. Name it and save it. You'll then find this new style in the Styles palette. Note: the style must be in its own layer.
10. Sometimes when you combine multiple images, there will be a bit of fringe around the edges of the composite images. Often you can hide this by going to Layers > Matting > Defringe. At the dialogue box, choose the default setting; it that doesn't work, undo it, and try Defringe again at a setting of 2.
11. Got too many layers? Simply select the right layer by using the move tool ( V ) Right click the mouse over the layer and a drop down list will come up. Alternatively, you can put your layers in layer sets. On the bottom of your layers palette, click the create new layers set (looks like a folder), name the new layer set, and just drag the layers you like in that set. Great for coping a set too. Highlight the set right click and copy.
12. If you want to toggle between Photoshop and ImageReady, press Shift-Command-M (Mac)/ Shift-Control-M (PC).
13. To access the Save for Web dialogue quickly, press Shift-Command-Option-S (Mac)/ Shift-Control-Alt-S (PC).
14. If you want to duplicate your current layer, press Cmd/Ctrl J.
15. To bring up the Extract dialogue box, press Command-Option-X (Mac)/ Control-Alt-X (PC). Within the Extract dialogue box, switch to the Extract Edge Highlighter tool by pressing the letter "b.", the Fill tool by pressing the letter "k.", and change the Edge Highlighter's brush size by holding the ] key to make it larger and the [ to make it smaller.
Read More...
Easy blur tutorials for your photo
It’s a wonderfully easy effect to soften a picture.
Duplicate your layer and apply a Menu - Gaussian Blur (Filter > Blur > Gaussian Blur) so that the details start to go, but not too much.
Set the opacity of the layer to 50%. This is a great, super-simple way to soften a picture. It can give it almost a dreamy look. Play with opacities until you find something that works really well with your shot.
and u can try for your other photo if u want to same effect ...
Read More...
Tuesday, February 10, 2009
Vector Tutorials with Macromedia Flash 8
Here I will discuss about "how to create a vector in the program Macromedia Flash 8" the only tools required following ...
and this tutorials ..
1. Open the Macromedia Flash Program.. Is New-Flash Document and OK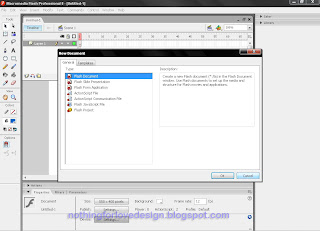
2. Import the image you want to create a vector you .. File-Import-Import to Library
3. Then right-click on the layer and..insert layer...
4. After that you click on your photo (Layer 1) and then Modify-Break Apart or can by pressing "Ctrl + B" after the lock (padlock logo) in the layer is 1 ..
5. Well now living layer 2 to layer your image karna cuma 1 as a shadow for you .. you can use the brush tool to outline or color separators, such as face, hair, etc. .. and for color selection to fit the image you can click the eye drop tool for coloring and use fill tool ... how simple we only use 2 layers .. a.untuk shadows and b. for we do vector ..
After that you File-Export-Export Image-save as jpg and you also need a Save original format
(. fla)
and this result I create ...
for the final stage if you want to use the background or text you can use photoshop to finishingnya if you still need additional your vector design ...
Happy Testing ...
Read More...
Tutorials Blood Effect
Few additional tutorial before posting a tutorial of making a seal. nah now I want to add how to create the effect of blood or blood effect ...
1. I here use the gray ash layer .. no problem you can simply use the default layer and self example transparant, black or white ..
2. Well after that you create new layers are colouring new layer with the color red .. select a bit older though the color of real blood..
after that you to the menu Filter - Render - Fibers
setting variance: 5.0 and strengnya 31.0
click randomizenya coz like that you have a small effect of the blood can directly ok ..
3. Well now so vertical layer settings you can go to menu Edit-Transform - Flip Vertical
and you go to Menu-Filter Stylize - diffuse - anisotropic
for lighting a little dark you can to Menu Image - adjusment - level live drag the arrow left and right most appropriate that you want .. same picture of the first ..
good luck...
Read More...
Tutorials Create Seals Effect
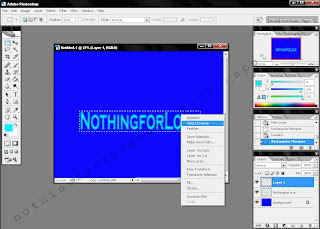
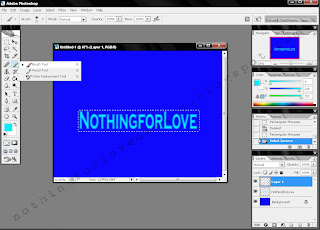
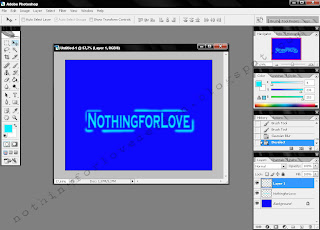
This little tutorial create effect a stamp for newbie .. I use photoshop cs 2 may be the same for make adobe photshop 7 ,adobe photoshop CS4 unless extended (only different in appearance) ok we start this tutorials ..
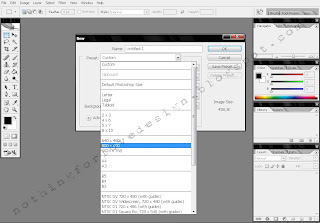
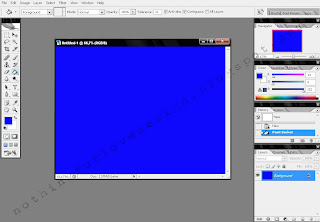
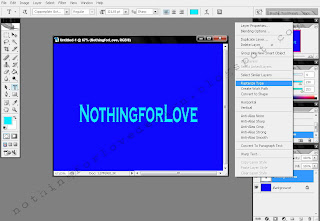
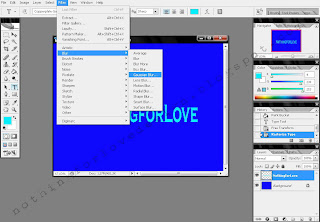
this looks ...
Read More...


